Showing posts with label makeup. Show all posts
7 Easy Steps to the Perfect Summer Beauty Routine

7 Easy Steps to the Perfect Summer Beauty Routine


Summer is officially here! Of course, for those of us who live in the northern part of Kentucky, it has felt like summer for several weeks. We went (as usual) from temperatures in the 30s and 40s to temperatures in the 80s and 90s. I would love to get some mid-70 temps for at least a month! Spring, where did you go??

Hot, humid temps mean that if I don't want my face to look greasy or have my makeup products literally slide off my face within a couple of hours, I have to be sure to make adjustments in my beauty routine. Ain't nobody got time for blotting all day!

pinnable image that says "7 easy steps to the perfect summer beauty routine"

I basically subscribe to the theory that if you need lighter/cooler clothing, then the same is probably true for your skincare and makeup. Of course that won't be the case for everyone, but for the most part, I think it's a safe bet.

Let's talk about skincare first:

CeraVe Hydrating Cleanser

(This post may contain affiliate links which were added to make it easier for you to find the items. If you click on an affiliate link and make a purchase, I will receive a small commission (at no extra cost to you). You are free to use the links or not - if you do, I thank you!)

1) Switch to a lightweight cleanser
Depending upon your skin type and the cleanser(s) you use, you may need a lighter cleanser in summer. Especially if you have combo or oily skin. By "lighter", I mean one that doesn't contain a ton of ingredients that are left behind on your skin - like a creamy moisturizing cleanser. Those with dry skin may still need that extra moisture, but it probably makes the rest of us feel hot and sweaty.

I use lightweight cleansers year round. The ones I've been using most since my rosacea diagnosis work well for me in all temperatures. I use CeraVe Hydrating Cleanser, La Roche-Posay Toleriane Hydrating Gentle Cleanser, or Acure Seriously Soothing Cleansing Cream. They're gentle and don't make my skin feel dry or greasy.


bottle of Timeless 20% Vitamin C + E + Ferulic Acid Serum

2) Use anti-aging products with a gel or serum base
Anti-aging products come in all shapes and sizes as well consistencies. If you usually use one that has a heavy cream base, you may find that switching to one with a lightweight serum or gel consistency works better in hot weather. And again, this will be especially true for those with combo or oily skin.

My anti-aging products are mostly serums that are lightweight and easily absorbed, so they work well year round. I use Timeless Vitamin C+E+Ferulic Acid, Timeless CoEnzyme Q10 Serum, and Argireline™ Solution 10%, Buffet Peptide Serum, and Niacinamide 10% + Zinc 1% Serum from The Ordinary.


CeraVe PM Facial Moisturizing Lotion

3) Try a lightweight moisturizer
I'm talking to my combo and oily girls here, because unless you have super dry skin, you're probably going to feel better using a lightweight moisturizer during the dog days of summer. Keep in mind that everyone is different and you should do what works best for your skin.

When it's hot, I either use a moisturizer that also contains 30 SPF (and some anti-aging ingredients) or a foundation that is an all-in-one product. I'm all about less layers of product on my skin. Fewer layers feel lighter and are also less likely to slide off my face in the heat. My favorite general daytime moisturizer/sunscreen is the RESIST Super-Light Daily Wrinkle Defense SPF 30 from Paula's Choice. It's lightly tinted, fragrance-free, mineral-based, and also contains antioxidants, including resveratrol. If I'm at the beach or going to be outside for an extended time I skip the moisturizer and just use a sunscreen with at least 50 SPF. At night, I use Pretty Pearlfection Cream and CeraVe PM Facial Moisturizing Lotion.


Paula's Choice Resist Super-Light Daily Wrinkle Defense SPF 30

4) Find a sunscreen that dries to a matte finish
How many times have you heard me say that sunscreen is the single most important thing you can do to combat the signs of aging? If you're spending money on anti-aging products/procedures and not using daily sunscreen, you're throwing your money away!

The trick is to find a few sunscreens that work well for you. For instance, I look for a mineral sunscreen to use on my face because chemical sunscreens burn my eyes and irritate my skin. It has to be fragrance-free, absorb completely and leave no tackiness on my skin. It also has to play nice with my skincare/makeup. For my body, I'm less picky. It can be a chemical sunscreen, but it still has to absorb completely without leaving my skin feel greasy - and be fragrance-free or only lightly fragranced. I mentioned my favorite facial sunscreen above, and you can read more about the rest of my favorite sunscreens in a past post.


Now let's talk summer makeup:

Missha Perfect Cover BB Cream, a beauty blender and a paddle brush

5) Switch to a lightweight foundation
I bet you know what I'm going to say! Are you sensing a theme yet? Yes! You're going to most likely want a lightweight foundation for the warmer months. I wish I could get away with just using a tinted moisturizer. But I need some coverage, and I have yet to find a tinted moisturizer that provides that. I suspect that at least some of  you are in the same boat.

Unfortunately, it can be difficult to find a lightweight foundation that also offers at least medium coverage. And doesn't settle into lines. And comes in the right shade. It's such a process, am I right?

The two that I'm reaching for in the heat are Missha Perfect Cover BB Cream and IT Cosmetics Your Skin But Better™ CC Cream.

The Missha BB Cream has a lighter consistency as well as decent, buildable coverage and SPF 42. The downside is the lack of colors - there are only seven. I blend three of their shades in the summer - #21 Light Beige, #23 Natural Beige, and #27 Honey Beige. I know that sounds excessive and you're probably thinking "I don't have time (or money) for that". But I promise - they're available at drugstore prices. I also wear this in the cooler months, but I only use one or two colors. (Read more at Product Review: Missha Perfect Cover BB Cream and Product Review: Missha Perfect Cover BB Cream (2017))

IT Cosmetics Your Skin But Better™ CC Cream

I have a love/hate relationship with the Your Skin But Better™ CC Cream. I stopped using it for a couple of years because I received a faulty tube and customer service on the IT Cosmetics website and I disagreed on how that should be handled. (You can read more about that here if you're interested.*) I found a sample tube in my stash that I started using a couple of  weeks ago and this stuff is so great on my skin with a light faux tan. I find that the Medium shade works best for me in the summer. It's great because it gives good medium coverage (I've never found it to be full-coverage as they advertise) and it also contains anti-aging ingredients and offers SPF 50. On most days I can skip moisturizer/sunscreen when I use this foundation because it's an all-in-one product.

(*I'm going to be purchasing a new tube - but I will buy from Sephora this time since they have great return/exchange policies. I struggle with knowing that I'm giving my money to a company that had poor customer service, but I'm comforting myself with the fact that IT Cosmetics is now owned by L'Oreal. I'm hoping their policies have changed, but I still recommend purchasing from a place that has a good return policy.)


e.l.f. High Definition Powder

6) Use a setting powder
Setting powder can help keep your makeup in place as well as take the shininess away. I use setting powder year round, but it's especially important for me when the weather is hot. I don't mind a little "glow" but I don't want to look like the dudes in Raiders of the Lost Ark when their faces melted off. Plus I feel like I can reapply throughout the day when/if needed without my face getting that "caked-on makeup" look.

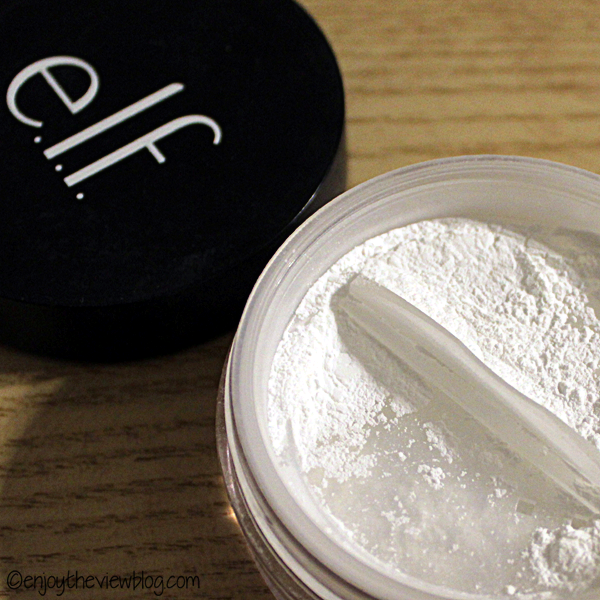
My favorite is super inexpensive - e.l.f. High Definition Powder in Sheer. For me, it works even better than expensive brands - and I've tried many of those. (read more at How Does e.l.f. HD Powder Measure Up?) It's also available in a compact if you prefer pressed powder to loose (and it's nice for throwing in your handbag). I also like the e.l.f. High Definition Undereye Powder (read more at How Does e.l.f. HD Undereye Setting Powder Measure Up?).


Skindinavia The Makeup Setting Spray

7) Definitely use a setting spray
Once you have all of the above on, you want to make sure it stays on, right? Then you need some setting spray! This is another product that I use year round, but I can't be without at all for summer.

I've tried several, but I like Skindinavia Makeup Finishing Spray and Urban Decay All Nighter Setting Spray best. If you haven't tried those, I recommend them both. (I've heard that Skindinavia makes UD's spray, so that's probably why I like them both.) I'm currently using the Skindinavia and it's fabulous at keeping my makeup in place. I know some people are concerned that it contains denatured alcohol, but I've never had a problem with it drying my skin.

pinnable image that says "7 easy steps to the perfect summer beauty routine"

And there you have it - my tips for getting your beauty routine ready for summer! What do you usually do to change your routine for summer? Let me know in the comments, on Instagram, or Snapchat!

Read more...
Kim
0 Comments
Product Review: GrandeLIPS Hydrating Lip Plumper

Product Review: GrandeLIPS Hydrating Lip Plumper


One of the many joys that accompanies getting older is loss of volume in your lips. Am I right?

My lips have never been thin, but my top lip is a bit thinner than the bottom, and over the past 4-5 years, I've noticed that the difference was becoming more pronounced. Plus there was just a general loss of volume. Ugh.

So what do you do when there's nooo way you're getting a needle repeatedly jabbed into your lips? (Or risking wonky lips - you know what I'm talking about - you've seen it, too!)

tube of GrandeLIPS Hydrating Lip Plumper

(This post may contain affiliate links which were added to make it easier for you to find the items. If you click on an affiliate link and make a purchase, I will receive a small commission (at no extra cost to you). You are free to use the links or not - if you do, I thank you!)

It pretty much leaves lip plumpers, which can temporarily plump up lips a little. I've tried a lot of lip plumpers (including DuWop Lip Venom back in the day) and to be honest. most weren't worth the money I spent on them. I'm not a fan of those with a minty flavor (although that's not a deal-breaker) and/or those that make my lips sting (I do understand that's how they work, but I don't like it) and only plump lips for a short amount of time.

There are some lip plumpers out there that also offer cumulative results rather than just a little plumping for a few minutes. That's what I was looking for in a plumper. And I've recently discovered one that I really like: GrandeLIPS Hydrating Lip Plumper!

I was first introduced to this product when one of my Influenster Voxboxes included a full-sized tube in Clear. When I saw that it contained Volulip and hyaluronic acid, I was really excited to try it. If you're not familiar with Volulip™, it's a lip plumper - increasing volume, hydration, and softness by working both internally and on the surface.

GrandeLIPS claims to improve lip volume in 3-5 minutes as well as increase overall hydration, volume, softness, and firmness in 30 days when applied twice daily. Honestly, I never saw a change in 3-5 minutes, but I faithfully used it twice daily for 30 days. And you know what? I did see a change. My lips had a little more volume - meaning they didn't look so flat and full of lines. And my top lip was now the same size as my bottom lip.

My biggest regret is that I didn't do before and after photos. And I'll tell you why I didn't - I was extremely skeptical that this product would work. Happily, I was proven wrong. I like it so much that I've repurchased and will continue to do so!

close-up of tube of lip product that shows how you can see when it's time to buy more
(GrandLips Hydrating Lip Plumper in Sunbaked Sedona)

There's just so much I love about this product! It has the perfect amount of stickiness. It stays on but doesn't make my lips stick together. You click the button on the end of the tube to dispense - two clicks was the perfect amount for me. And as you can see from the photo above, you know when it's almost empty and time to repurchase!

lip product
(GrandLips Hydrating Lip Plumper in Spicy Mauve)

The applicator is pure genius! I love that it is (what I assume) silicone, so it's always clean. It has a slanted, flexible tip that makes application soooo easy! I wish all of my lip products were in this type of applicator!

And it doesn't sting! I did read some reviews where people said they experienced a brief tingling, but if I did, it was very mild and only the first couple of times I used the product. The GrandLIPS website says that the product has a vanilla flavor, but I've never noticed a scent or taste.

Does it make my lips look like they did when I was 20? Of course not. However, not only do they look much better than they did, but I've noticed that my other lip products are easier to apply. Yes, my lips still have some creases - I'm 56, not 30 - and honestly, I don't want my lips to be so plump that they're completely smooth. (It's okay if you do, though!)

Two tubes of GrandeLIPS Hydrating Lip Plumper

The full-size tube is $27, and mine lasted about 8 weeks using it twice daily. (I thought I had taken photos of it, but I can't find them anywhere, so I only have photos of the mini tubes. Oops!) I purchased a trio of minis from Sephora over the holidays, which I believe was also $27. It contained Clear, Spicy Mauve, and Sunbaked Sedona. The Sunbaked Sedona is a bit too warm for my coloring, but I do like the Spicy Mauve, which is cooler. For daily lip color, I prefer something with more staying power (like a lipstick over a liner or Lipsense), so I use this as more of a lip treatment than a lipgloss. I plan to repurchase the full-size Clear next time.

You guys, I really love this! They also make a product called GrandeLASH-MD that I'd love to try, but it's pretty pricey. I do have a sample of their GrandeMASCARA, so I can't wait to see how I like that. I'm also thinking of trying their GrandeBROW-fill (not to be confused with their GrandeBROW, which is way more expensive) since I can't get my beloved Benefit Gimme Brow anymore. (sob)

tube of GrandeLIPS Hydrating Lip Plumper

Have you tried any of the Grande Cosmetics products? I need details! Leave a comment, send me a snap, or join me on Instagram (I'm enjoythevue on Snapchat)!

Products mentioned in this post:
DuWop Lip Venom
GrandeLIPS Hydrating Lip Plumper
Lipsense
GrandeLASH-MD
GrandeMASCARA,
GrandeBROW-fill
GrandeBROW
Become a part of Influenster!


Read more...
Kim
0 Comments
Clinique Pep-Start Pout Restoring Night Mask, where have you been all of my life??

Clinique Pep-Start Pout Restoring Night Mask, where have you been all of my life??


I'm really, really picky about lip products. Especially the one I use at night. I've used a lip balm at night for many years (15+). But not just any lip balm. It has to be something that has a lot of slip, no stickiness, and hydrates my lips.

My favorite product from many years ago was by Aromaleigh. They had these glossy balms that were very hydrating and had the most luscious scents. (I loved the chocolate-orange!) The company closed, and when they reopened a few years ago, they eventually reintroduced the balms. While I like them, they're not the same as the original ones.

I also like the Sephora balms. They have a lot of slip, they're not sticky, and they're hydrating - but I find I have to apply many layers to get it to stay on for a couple of hours. I use them a lot during the day when I'm at home. But for nighttime use, what I really want is something that will stay on until morning.

tube of Clinique Pep-Start lip product

(This post may contain affiliate links which were added to make it easier for you to find the items. If you click on an affiliate link and make a purchase, I will receive a small commission (at no extra cost to you). You are free to use the links or not - if you do, I thank you!)

A few weeks ago, one of the free samples I got with a Sephora order was the Pep-Start Pout Perfecting Balm and Pout Restoring Mask by Clinique. I put it aside for several days because I was less than impressed with the Pep-Start Eye Cream and assumed I wouldn't like this either.

Yeah, yeah, I know. It's true what they say about assumptions. Because I absolutely love this product! I went through my sample and ordered a full-size!

Clinique Pep-Start Pout Restoring Night Mask

As with other Clinique products, it's allergy tested and 100% fragrance free.

Clinique Pep-Start Pout Restoring Night Mask

It pretty much has the consistency of Vaseline (which isn't surprising since the first ingredient is petrolatum), but it's nicer. It also contains castor oil, ceramides, and a couple of butters. It seems a little thick as it comes out of the tube, but warms as soon as you put it on your lips, making it very easy to apply. And it stays on for hours and hours and hours. At least it does for me. If I put it on before bed, I can still feel it on my lips when I wake up 8 hours later. THAT'S what I've been looking for in a nighttime lip product!

Between this and the GrandeLIPS Hydrating Lip Plumper (review here!), my lips are very happy!

Clinique Pep-Start Pout Restoring Night Mask

My one complaint is the applicator. I don't like it at all. If they could put this in an applicator like GrandeLIPS, I would be ecstatic. The GrandeLIPSs slanted silicone tip makes application so easy. The Clinique applicator makes me feel like I'm in high school again, smearing some fruity lipgloss all over my lips! I've just been squeezing out the proper amount and then using my finger to apply. It's annoying, but I love the product, so I'll make do.

I like this product so much that I've added it to my list of favorite products on Amazon - you can shop for them all in one place!

Do you use a special product on your lips at night? Let me know in the comments, send me a snap, or join me on Instagram!


Read more...
Kim
0 Comments
How Does e.l.f. HD Undereye Setting Powder Measure Up?

How Does e.l.f. HD Undereye Setting Powder Measure Up?


Of all the issues that come with aging, one of the ones that has caused the most distress for me is the skin under my eyes. Up until a a few years ago, I had never experienced dark circles. Now I not only have those, but I also have crepe-y skin and puffiness. Fun times!

A lot of people just slap on some concealer and setting powder and they look fantastic. Me? Not so much. Most concealers either cake or creep into lines, and powders just emphasize the wrinkles. Honestly, just leaving the area covered with light foundation looked better than trying to conceal.

jar of e.l.f. undereye setting powder

(This post may contain affiliate links which were added to make it easier for you to find the items. If you click on an affiliate link and make a purchase, I will receive a small commission (at no extra cost to you). You are free to use the links or not - if you do, I thank you!)

I recently reviewed e.l.f.'s HD Setting Powder, which I had picked up during a sale for $3 (reg price $6). At that time, I also ordered their HD Undereye Setting Powder, which comes in a 0.04 oz. jar with a sifter top and a tiny brush for $3 (so I got it for $1.50). Yes, I know - just $1.50!

jar of elf undereye setting powder and small black brush

The powder is very finely milled and so silky! It also contains vitamins C and K, which are supposed to help strengthen the skin. I don't know about that, but I do know that I really, really like this powder! As you can see in the photos below, the powder isn't white - it has a very slight pink/peach tint that is great for the undereye area.

Ingredients: Dimethicone/Vinyl Dimethicone Crosspolymer, Mica, Talc, Synthetic Fluorphlogopite, Polymethyl Methacrylate, Dimethicone, Zinc Stearate, Silica, Sodium Dehydroacetate, Ascorbyl Palmitate, Phytonadione.

e.l.f. HD undereye setting powder and makeup brush

I don't use the brush that came with it - I use the Sephora Pro Airbrush Concealer Brush #57 (shown in the above photo). Less expensive alternatives would be Real Techniques Concealer Brush or the e.l.f. Flawless Concealer Brush.

e.l.f. HD Undereye Setting Powder

Here's how I have my Tim Gunn moment ("make it work" for those who aren't Project Runway fans):
1) After my usual morning skincare routine, I apply a light oil to my undereye area. I rub one drop between two fingers and then lightly pat the oil under each eye. (I use tarte maracuja oil or rosehip oil)
2) Next I apply my foundation (which is Missha BB Cream) with my fingers or a brush, but not under my eyes. Once the foundation is on, I use a damp beauty blender to smooth it. When I'm finished, I use what little foundation is on the sponge to press a little foundation under my eyes.
3) Now I apply Maybelline Instant Age Rewind Brightener (which is a pale pink), using my finger, not the spongy applicator tip. I pat a small amount under each eye and keep patting until it is blended and smooth.
4) Lastly, I swirl my concealer brush in the e.l.f. Undereye Setting Powder, tap off the excess, and press it under my eye - starting at the outside corner and working my way in. I am sort of "dotting" it on rather than using a sweeping back and forth motion.

Not only does this powder keep the concealer/brightener in place without making my undereye area look wrinkly, it has also cut down on the transfer of eyeshadow, eyeliner, and mascara.

What do you have to lose for $3 (or less)? I definitely recommend giving it a try. And I like it better than the super-popular Laura Mercier Secret Brightening Powder, which is way more expensive!

Have you tried the e.l.f. HD Undereye Setting Powder? What did you think? What's your favorite undereye powder? 


Read more...
Kim
0 Comments
How Does e.l.f. HD Powder Measure Up?

How Does e.l.f. HD Powder Measure Up?


Not everyone uses a setting powder. I not only use one, I need one.

But one of the issues with mature skin is that there is a fine line (pun intended!) between setting your makeup and emphasizing every line on your face. The wrong powder (or too much powder) can add years to your face, and no one over the age of 30 wants to look older!

jar of e.l.f. High Definition Powder on a table

(This post may contain affiliate links which were added to make it easier for you to find the items. If you click on an affiliate link and make a purchase, I will receive a small commission (at no extra cost to you). You are free to use the links or not - if you do, I thank you!)

About a month ago, I snapped up a jar of e.l.f. HD Powder during a 50% off sale. I had heard good things about it, and I figured for $3, I couldn't lose. That's right, I said $3! It regularly sells for just $6 - how is that possible?

e.l.f. High Definition setting powder in the product lid


I purchased this powder in sheer, but it is also available in soft luminance, and corrective yellow. As I mentioned, the regular price is $6 for 0.28 oz., but you can often get it on sale. It's packaged in an interesting jar. There is a sifter on top, with holes on one side, and a little "dial" that you turn to cover or uncover the holes. It also comes with a cosmetic puff.

I've tried a lot of setting powders, including Makeup For Ever Ultra HD Microfinishing Powder ($36 for 0.29 oz.), tarte Smooth Operator Amazonian Clay Finishing Powder ($33 for 0.32 oz.), and Laura Mercier Invisible Loose Setting Powder ($38 for 0.4 oz.)- but I love the e.l.f. best! I love it so much that I also bought some for my daughter. (Now I'm trying not to think about all of the money I've spent on setting powders in the past!)

Ingredients (sheer only): Dimethicone/Vinyl Dimethicone Crosspolymer, Silica, Sodium Dehydroacetate.

The powder is very finely milled, and I get my best results by applying it very lightly with the cosmetic puff. Depending upon your skin and how you wish to apply, a fluffy brush may work better. I've had to switch to a more hydrating foundation in the past few months, which is great for my skin, but it tends to settle into lines more than other foundation. Since I started using the e.l.f. powder, I have had minimal to no makeup settling in lines.

open jar of e.l.f. High Definition Powder with puff


I like the concept of the sifter with the dial, but it seems to be loose, which allows powder to seep up through the sifter and creep out into the top of the jar. When I recently flew from Kentucky to Tampa, Florida and back, there was some powder in the top of the jar, but not nearly as much as I've seen with sifters that don't have a cover. I also left the cosmetic puff inside the jar, so I think that helped some, too. (The first photo in this post shows how much powder "leaked" out during my flights.) It's not a deal breaker, especially considering the price of the powder.

I saw that some reviews complained about flashback when using this powder. I didn't experience that, but I apply it very lightly, and then I do a light dusting of lightweight foundation powder over my cheeks, forehead, nose, and chin (avoiding facial lines). I apply blush over it as well. So I don't use it as the last step in my makeup routine.

e.l.f. High Definition Powder

I'm amazed that a product that costs $6 (or $3 in my case) works so well. Good job, e.l.f. - I highly recommend this one! Don't miss my upcoming review on their HD Undereye Setting Powder!

Do you use a setting powder? Why or why not? Which is your favorite? Let me know in the comments or send me a snap!

Read more...
Kim
0 Comments
The Easy (and Inexpensive) Way to Clean Your Blending Sponges

The Easy (and Inexpensive) Way to Clean Your Blending Sponges


Do you use blending sponges for your makeup? I do! Not for every foundation I use, but for the majority of them, the blending sponge gives me a better finish. They're pretty amazing, but not without problems. The biggest complaint I hear (and I agree): They can be so dang difficult to get completely clean!

makeup blending sponges

(This post may contain affiliate links which were added to make it easier for you to find the items. If you click on an affiliate link and make a purchase, I will receive a small commission (at no extra cost to you). You are free to use the links or not - if you do, I thank you!)

Back in March, I did a review on the Beauty Junkees sponges that I purchased on Amazon. I'm still really impressed with them. Not just with the way they work, but also with how long they have lasted! I use them several times a week, and I just purchased more - after 5+ months!

Yes, I know. Using makeup sponges for 5 months? I'm sure some of you think that's gross. But I've discovered a way to keep these babies spotless, and they are just now starting to get cracks in the surface!

Dr. Bronner's peppermint castile soap

I mentioned in my post in March that I had been using Dr. Bronner's Peppermint Castile Soap to clean my sponges. It contains several types of oil, which I believe is the trick to getting the sponges clean. I didn't choose the peppermint version for any particular reason - I just happened to have it on hand. When I repurchase, I'm going to get the almond - I love the scent of almond! But I gotta tell ya - this stuff is amazing! (Update: I did purchase the almond and I love it!)

What I do: I put 4-5 drops in a little container (you could use a small bowl), and add 2.5-3 oz. of warm water. I dip a sponge in and let it absorb a little, then set it aside while I dip the next sponge. I don't completely saturate the sponges with the first dip. I just get enough solution on them to dampen them a little. Then I gently squeeze them to work that in a little. Once I've done that to both sponges, I dip them in the solution again., allowing them to absorb more - splitting the remaining solution between the two sponges. Then I start gently squeezing them to work the solution into the sponges. At this point, you will see the makeup start to dissolve and disappear. I add a little warm water to the sponges as needed, then I start rinsing the sponges when I see the makeup is gone. (Note: I usually clean two sponges at a time, so if you're only cleaning one, you would use less soap and water.)

This takes just a couple of minutes, and the sponges look like new! I do find that it works best and more quickly if I clean the sponges the day after using them. In other words, it's easier to get makeup out of the sponges once they have dried.

Take a look at these sponges! I took this photo last month when they were FOUR. MONTHS. OLD! Other than being a little faded, they look like new!

If you're like me, cleaning your makeup blending sponges and removing all of the makeup is a challenge. I've discovered an easy (and thrifty) way to make them look like new!

Ingredients for the peppermint version:
Water, Organic Coconut Oil*, Potassium Hydroxide**, Organic Palm Kernel Oil*, Organic Olive Oil*, Mentha Arvensis, Organic Hemp Oil, Organic Jojoba Oil, Mentha Piperita, Citric Acid, Tocopherol
*CERTIFIED FAIR TRADE INGREDIENTS
**None remains after saponifying oils into soap & glycerin.

With Dr. Bronner's, you get three times the amount for only a third of the price of Liquid blendercleanser. And that's not even taking into account that you dilute the Dr. Bronner's, so you really have even more! I've used the liquid blendercleanser, and while it works, in my opinion, it doesn't work any better than Dr. Bronner's. And there's the added benefit of being able to use the Dr. Bronner's for other things - face, body, hair, dishes, floors, pets, etc. Here's a list of uses and dilutions, directly from Dr. Bronner's website.

Dr. Bronner's castile soap

Dr. Bronner's Pure Castile Liquid Soap is available in eight scents: Almond, Baby Unscented, Citrus, Eucalyptus, Lavender, Peppermint, Rose, and Tea Tree. The Almond and Rose versions are the only ones with added fragrance.

four makeup blending sponges

How do you clean your makeup sponges? Tell me in the comments, or hit me up on Instagram!


Read more...
Kim
0 Comments
Skin Benefits of Wearing Chocolate Makeup (with DIY recipes!)

Skin Benefits of Wearing Chocolate Makeup (with DIY recipes!)


Want a guilt-free way to enjoy chocolate? Makeup and skincare products! Cocoa contains antioxidants and can increase circulation. Check out the DIY chocolate skincare recipes!

(This post may contain affiliate links which were added to make it easier for you to find the items. If you click on an affiliate link and make a purchase, I will receive a small commission (at no extra cost to you). You are free to use the links or not - if you do, I thank you!)


Who loves chocolate? *raises both hands* I do, I do!! Just the smell is enough to make my mouth start watering!

There are several chocolate-infused makeup products and skincare products on the market. I absolutely love Too-Faced Cosmetics Chocolate Soleil and Milk Chocolate Soleil Matte Bronzers. And have you seen their new Cocoa Powder Foundation or the Chocolate Bar Eye Palette? Girl, I'm going to have to go eat a piece of Dove Chocolate in a minute!

Gwen Lewis is back today with a post about the skin benefits of wearing chocolate makeup. AND...she has included a few DIY recipes for some chocolate skincare! Stick around and check it out!


Skin Benefits of Wearing Chocolate Makeup

Chocolate fondue for your face is a delicious reality. Except this fondue isn’t a remnant of last night’s dessert. Chocolate-infused makeup and face masks are the new beauty trend, and they are a sweet decadent delight and completely guilt-free!

Cocoa in its pure form is filled with antioxidants and helps increase circulation. While most of us choose to eat our chocolate, facial scrubs, masks and cosmetics featuring cocoa have sweetened our options.

While cocoa offers skin benefits, its scent also lifts us up. Smelling chocolate is like smelling coffee…it makes us feel invigorated and happy. And eating chocolate - bars that contain at least 70 percent cocoa - also can help lower stress, relieve coughs, lower the risk of diabetes and even help with weight loss.

Sweet cocoa has been infused into eye shadows, bronzers and even lipsticks to drench your face in the pure sweet decadence. But, please, don’t start eating your palettes or chomping on your lippies…this chocolate is for beauty only.

However, if you want to mix up a few recipes that you can dip a finger into while also treating your skin, try a few DIY face masks and scrubs that feature cocoa as the main ingredient.

Chocolate Oatmeal Face Mask

Cocoa contains antioxidants and can increase circulation - check out the DIY chocolate oatmeal face mask recipe!

Gourmande in the Kitchen created this simple four-ingredient face mask. Honey, cocoa powder, cream and oatmeal combine for the perfect no-bake face cookie! Kidding, but it does smell like something you’d bake up in the oven. To serve up this mask, mix 1/3 cup of cocoa, ¼ cup of honey, 2 cups of heavy cream (or sour cream…per the site) and 3 tablespoons of oatmeal powder. Apply the mix to your face and let it sit for about 20 minutes. Good luck not tasting the mask before putting it on your face…it’s pretty tempting!

Chocolate Sugar Face Scrub

Cocoa contains antioxidants and can increase circulation - check out the DIY chocolate sugar face scrub recipe!

Sometimes I like to fly by the seat of my beauty pants and mix up random concoctions. This yummy sugar scrub is crafted by mixing three ingredients: coconut oil, sugar and cocoa powder. I don’t really measure my ingredients, but I probably use about a teaspoon of coconut oil, ½ teaspoon of cocoa powder and a tablespoon of sugar. I use this scrub for my T-Zone, so I never mix up a lot. However, if you want a larger scale recipe for gifting or just to have on hand in the bathroom, check out Sarah Miller’s recipe over at Snapguide. She uses almond oil and vanilla in her scrub…which probably adds even more yummy deliciousness to the recipe!

Cocoa Bath Bliss

Ever want to bathe in chocolate? Cocoa contains antioxidants and can increase circulation - check out the DIY chocolate milk bath recipe!

Many spas feature mud baths for skin treatments. Who wants mud, though, when you can bathe in chocolate? Leave it to Food.com to capture melted chocolate bath fantasies! If you’ve dreamed of surrounding yourself in pure chocolate, this recipe is for you! Chocolate Milk Bath features four ingredients: 1 cup of powdered milk, 1/8 cup of cocoa powder, 1 tablespoon of cornstarch and ½ teaspoon of cinnamon. Mix all four ingredients and then add it to a running hot bath. Soak and enjoy as you surround yourself in hot cocoa!

Chocoholics can take joy in the new wave of cocoa-infused beauty products. And, if you don’t feel like splurging on the name-brands, mix up your own chocolate treatments at home. Just don’t eat the masks or drink your bathwater. Although it is still perfectly acceptable to lick the mixing spoon!

Gwen Lewis is a writer who lives in California. She has been in the makeup and fashion industry for years and loves writing on the topic to give tips from experience. In her free time she loves to stay active and has just taken on learning how to surf.

Don't forget to check out Gwen's other posts: Enhance Your Beauty With Yoga, Tips That Help Your Makeup Last Longer, The Complete Guide to Spring Cleaning Your Beauty Products, Beauty Threats: Why Sharing Makeup is More Dangerous Than You Think!, Beauty and Nutrition Tips for Spring, and Pampering on Purpose: Why treating yourself is healthy, not frivolous!.


Read more...
Kim
0 Comments
New from L'Oreal Paris This Summer!

New from L'Oreal Paris This Summer!


Drugstore beauty brands have really stepped up their game the last couple of years. I've found several products that I really like - and if I can save a few bucks by buying from the drugstore, that makes it even better! L'Oreal Paris has a ton of new products that became available on July 1, and they were kind enough to send me a few of them.

L'Oreal powder, concealer, lip pencil and lipstick

(I received complimentary products and/or compensation for this post, but all opinions are honestly mine.)

On days when I'm staying at home or just running an errand or two, I usually don't bother with a full face of makeup. A tinted moisturizer, a little blush, mascara, and lipstick and I'm done. I usually use a light hand with any powder makeup because it tends to make my skin look "dry", which is aging. I'm trying to age as gracefully as I can, so I certainly don't need my makeup adding years. Who's with me?

But I have to tell you - I like the new L'Oreal Paris Infallible Pro-Glow Powder! These handy little compacts contain two powders in the same pan. The bottom one is matte and the top one is a highlighter. You can use each one separately or you can mix them together for an "all-over" glow. I like the design of the compact because the powder pan is in the top section, and the mirror and cosmetic sponge are in the lower part. It's priced at about $12-13 for 0.31 oz.

L'Oreal Infallible Pro-Glow Powder

I've used the matte powder both alone and mixed with the highlighter. On days I'm just at home, I've been applying it as light coverage over my sunscreen, using the Real Techniques Expert Face Brush. The coverage is buildable without being cake-y or making my skin look dry! A little spritz of setting spray, and it stays on all day without settling into fine lines. I haven't tried applying it with the accompanying sponge, so I can't say how that works.

swatches of L'Oreal Pro-Glow Powder shade 22

swatches L'Oreal Pro-Glow Powder in shade 23

I've also used highlighter alone, applied with the Real Techniques Setting Brush. It's pretty subtle, which I like, but as you can see in the photos above, it contains microglitter. At my age, I prefer a pearlescent glow, but the "sparkle" is not as noticeable when I use the highlighter mixed with the matte powder all over my face.

I did experience an issue with one of the compacts. I popped it in the makeup bag that I keep in my handbag, and when I took it out at the end of the day (I hadn't used it) - the powder was cracked into pieces. It's possible that it was damaged from being shipped to me and I just hadn't noticed it - because since then, I've carried the other one and it has been fine.

L'Oreal Paris Infallible Pro-Glow Powder compact

There are 8 shades available - I have it in Creamy Natural (22) and Nude Beige (23). I haven't yet tried it on my pale, untanned skin, but both of these shades work well with my light sunless tan. I'm pretty sure that I will be repurchasing this product despite the microglitter. It does contain fragrance (please make makeup fragrance-free, L'Oreal!), but I haven't noticed it, and there has been no irritation.

Ingredients:  Talc, Zea Mays Starch / Corn Starch, Dimethicone, Octyldodecyl Stearoyl Stearate Zinc Stearate, Pentaerythrityl Tetraisostearate, Caprylyl Glycol, Phenoxyethanol, Tocopheryl Acetate, Hexylene Glycol, Parfum / Fragrance, Silica Benzyl Salicylate, Panthenol Benzyl Alcohol, Linalool Limonene. May Contain: CI 77491, CI 77492, CI 77499 / Iron Oxides Mica CI 77891 / Titanium Dioxide CI 77007 / Ultramarines, CI 75470 / Carmine.

L'Oreal Paris Infallible Pro-Glow concealer!

Concealers can be difficult for those of us over 50. It's probably the one makeup product that gives me the most trouble - in both finding the right shade and getting it to look okay once it's applied. Lately, I've had the added aggravation of a small amount of dryness and flaking in my "tear troughs", which I believe is related to my use of tretinoin (even though I don't use it under my eyes). You can't see it until I apply concealer - then BAM! Not pretty. A couple of weeks ago, after watching one of Wayne Goss' YouTube videos, I started using a tiny drop of whatever oil I have on hand (jojoba, grapeseed, sweet almond, etc.) to my undereye area right before I apply concealer. It has definitely helped, but some concealers still accentuate things I want to hide!

The Infallible Pro-Glow Concealer from L'Oreal has a lightweight consistency and is easy to blend, especially over the oil. It's fairly sheer, but I'm applying over oil and that likely makes it more sheer. I've found that I can build coverage if I'm careful. I haven't noticed any glow/highlight to it, so sometimes I top it with a little highlighting concealer right in the tear troughs to make them look less sunken. Once I've patted it smooth, I dust lightly with setting powder. So far, I'm pleased with the results!

swatches of L'Oreal Paris Infallible Pro-Glow Concealer in shade 04

This concealer is available in 8 shades, priced at about $9-10 for 0.21 oz. I have the Natural Beige (04), and it isn't exactly the right shade for me, but it's sheer enough that I've been able to make it work. I wish this concealer offered a little more coverage, but I feel like coverage is something I'm willing to sacrifice in order to not have a caked-on look. If I can't have both, then I would definitely rather have less coverage than caked-up concealer under my eyes! Bonus: this also contains a couple of peptides that are part of Matrixyl 3000, so you're getting some anti-aging/skin-restoring benefits as well.

Ingredients: Cyclopentasiloxane, Aqua / Water / Eau Propanediol, Alcohol Denat., Glycerin, Phenyl Trimethicone, PEG-10 Dimethicone, Bis-PEG / PPG-14 / 14 Dimethicone, Ethylhexyl Hydroxystearate, Magnesium Sulfate , Talc, Phenoxyethanol, Nylon-12, Disodium Stearoyl Glutamate, Dimethicone, Caprylyl Glycol, Caffeine, Steareth-20, Aluminum Hydroxide, Chlorhexidine Digluconate, N-Hydroxysuccinimide, Potassium Sorbate, Palmitoyl Oligopeptide, Chrysin, Palmitoyl Tetrapeptide-7. May Contain: CI 77891 / Titanium Dioxide, CI 77163 / Bismuth Oxychloride, CI 77491, CI 77492, CI 77499 / Iron Oxides.

L'Oreal Paris Colour Riche Matte Lip Pencil


I've used lip liner since I was in my mid-late twenties. It makes my lipstick last longer, and I like having precise lines. Plus now that I'm older, it helps keep my lipstick from feathering into those dreaded upper lip lines. Thanks, Mother Nature! L'Oreal's Colour Riche Matte Lip Liner is a sharpenable pencil that can be worn alone or under lipstick and claims to be both creamy and matte.

It is definitely creamy and I would call it a satin matte, which I prefer. It glides on easily, and I've been able to get about 6 hours wear from it, even with eating/drinking. I usually apply the liner, top with a light dusting of setting powder, then add lipstick.

L'Oreal Paris Colour Riche Matte Lip Pencil (Matte's It) & Matte Lipcolour (Matte Caron)
(L, L'Oreal Colour Riche Matte Lipcolour in Matte Caron; R, L'Oreal Colour Riche Matte Lip Liner in Matte's It)

It's available in 8 shades, and is priced at about $7-$9 for 0.04 oz. I have it in Matte's It (110), which is a darker nude. It's a little more "brown" than I prefer, but since I do like the consistency and staying power, I'd like to try it in Best Mattes and Strike A Matte-ch.

Ingredients: Methyl Trimethicone, Polyethylene, Trimethylsiloxysilicate, Synthetic Fluorphlogopite, Octyldodecanol, Nylon-12, Paraffin, Acrylates / Dimethicone Copolymer, Cera Microcristallina / Microcrystalline Wax / Cire Microcristalline, Polyisobutene, Alumina, Disteardimonium Hectorite, Propylene Carbonate, Calcium Sodium Borosilicate, Pentaerythrityl Tetra-Di-T-Butyl Hydroxyhydrocinnamate, Aluminum Hydroxide, Tin Oxide, BHT. May Contain: CI 77891 / Titanium Dioxide, CI 77491, CI 77492, CI 77499 / Iron Oxides, CI 15850 / Red 7 Lake, CI 15850 / Red 6, CI 77120 / Barium Sulfate, CI 45410 / Red 28 Lake, CI 77742 / Manganese Violet, CI 42090 / Blue 1 Lake.

L'Oreal Paris Colour Riche Matte Lipcolour (Matte Caron)

I tend to avoid matte lipsticks because I think they're tricky for mature lips. They can make lines and lack of fullness more noticeable, and if the color is too light, it can be less than flattering. However, L'Oreal Colour Riche Matte Lipcolour is exactly the kind of matte lipstick I love!

The formula is creamy, easy to apply - and is what I would consider a satin matte. My lips don't feel dry, and it's quite comfortable to wear! You still want to be sure your lips are well-exfoliated, because it will accentuate any dry, flaky areas, but I really like this lipstick. It says it has fragrance, but I don't really notice it.

L'Oreal Paris Colour Riche Matte Lipcolour (Matte Caron)

These are available in 16 shades, priced at $6-$9 for 0.13 oz. I have it in Matte Caron (800), which is a gorgeous nude pink. It's such a pretty color! I do feel like it's just a little too light for me on it's own, but it pairs wonderfully with my Urban Decay Naked lipstick. First, I apply the L'Oreal Colour Riche Matte Lip Liner in Matte's It and dust lightly with setting powder. Next I apply the UD lipstick around the perimeter of my lips, then fill in the inner part with the L'Oreal Matte-Caron. The results are a very pretty, subtle ombre, and it's been lasting about 3-4 hours with eating and drinking. As a matter of fact, even after eating, it really only needs to be reapplied at the waterline. I like this one so much that I need to try the Matte-Moiselle Pink!

Ingredients:  Dimethicone, Bis-Diglyceryl Polyacyladipate-2 Hydrogenated Polyisobutene, Phenyl Trimethicone, Tridecyl Trimellitate, Ozokerite, Hydrogenated Jojoba Oil, Dimethicone Crosspolymer, Isostearyl Isostearate, Kaolin, Isohexadecane, Vinyl Dimethicone / Methicone Silsesquioxane Crosspolymer, Nylon-12, Polyethylene, Alumina, Synthetic Fluorphlogopite, Silica, Calcium Aluminum Borosilicate, Geraniol, Aluminum Hydroxide, BHT, Colophonium / Rosin / Colophane, Benzyl Alcohol, Calcium Sodium Borosilicate, Tocopheryl Acetate, Rosa Canina Fruit Oil, Hexyl Cinnamal, Hydroxycitronellal, Tin Oxide, Magnesium Silicate, Methyl-2-Octynoate, Tocopherol, Propylene Glycol, Propyl Gallate, Citric Acid, Parfum / Fragrance. May Contain: CI 77891 / Titanium Dioxide, CI 45410 / Red 28 Lake, Mica, CI 77491, CI 77492, CI 77499 / Iron Oxides, CI 15850 / Red 7, CI 45380 / Red 22 Lake, CI 15985 / Yellow 6 Lake, CI 77742 / Manganese Violet, CI 19140 / Yellow 5 Lake, CI 15850 / Red 7 Lake, CI 42090 / Blue 1 Lake, CI 77120 / Barium Sulfate, CI 15850 / Red 6, CI 17200 / Red 33 Lake, CI 75470 / Carmine.

If you'd like to check out the other new L'oreal Paris products, I have provided the links below:

Have you tried any of the new products? Let me know what you thought of them or tell me which ones you'd like to try! Leave a comment here!


Read more...
Kim
0 Comments