Of course, I almost never follow directions exactly, so this is my spin on it. Note: the color of the shirt looks different in all the photos - I swear it's the same shirt, the lighting just made it look different!
First, I cut slits in the fabric around the neckline. Since this shirt had a band around the neckline, I left that intact, and cut the slits about 1/4" away from it. I made my first slit about 1/2" wide, and the rest about 1". They were spaced about 1/2" apart.
Next, I took loop #2 and pulled it under & through loop #1. Holding onto loop #2, I then pulled loop #3 under & though loop #2. So loop #4 goes under & through loop #3, and I think you see the pattern.
About 3/4 of the way through, I stopped to look at the braid. I thought it looked like it was pulling too much, so I undid the braid, and started over.
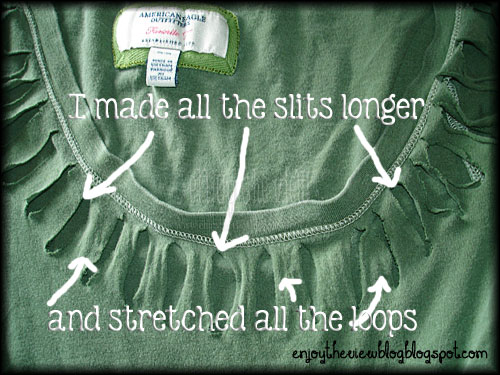
I made all the slits just a little larger, and then I manually stretched the loops (not the holes).
Then I started over. It worked better this time since the fabric wasn't so tight.
When the last loop was pulled through, I held it in place while I sewed it from the back.
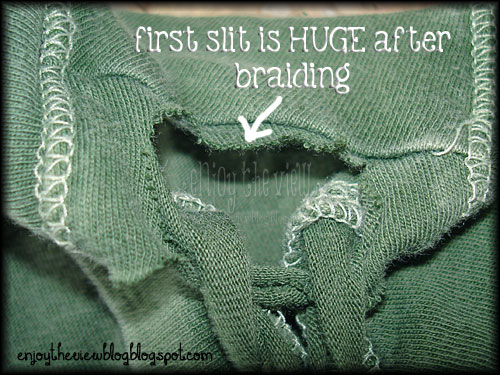
As you can see, even though I made the first slit smaller than the rest, it still pulled too much and left a huge opening.
I just tacked that in place from the back as well.
It's kind of cute! I think I like the band above the braid - sort of gives it a finished look.
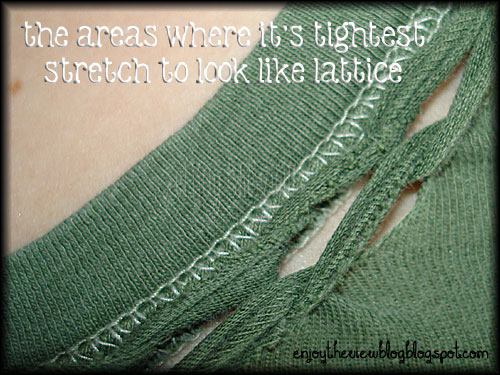
When I had Lulu put the shirt on, the braiding stretched, which removed the puckering, but it also stretched some of the loops so that they resembled latticework. I actually liked the way the braid looked better BEFORE she put it on. So I think if you want the look of the braid to stay "intact", it's important to use a shirt that isn't tight or fitted at the neckline.
But I also had another concern! Having purchased shirts from Loft and Ann Taylor with t-shirt fabric trim/appliques, I know that once they're washed, they never, ever look the same again. The fabric scrunches up and curls and is impossible to iron back into shape (unless it's something simple and on a larger scale). I'm afraid that is what will happen to this unfinished edge braid.
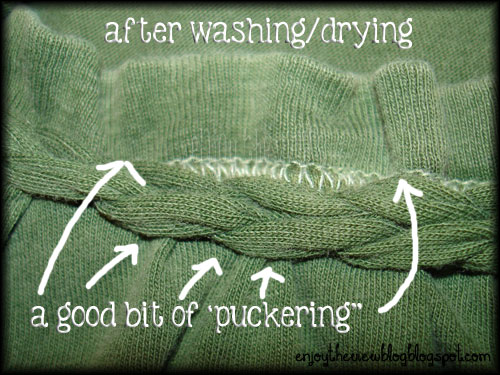
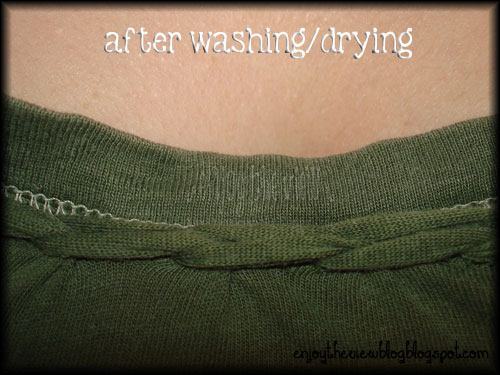
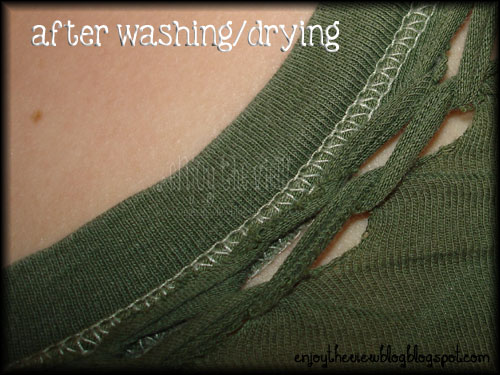
So, of course, I had to wash and dry the shirt to see how it looked! There was a good bit of puckering around the neckline, but the cut loops still looked about the same as before washing!
I don't really think there is much difference between the before & after pics! I wish my more expensive tops had fared that well!
Note: looking carefully at the pictures of the BR shirt, I think that the matching braided trim has been sewn onto the shirt and isn't actually part of it. Braiding the actual shirt fabric pulls and causes the fit to be a little weird, so I don't think there is any way to do it and have the shirt drape as nicely as the BR one. I think their strips were braided, then sewn into the shoulder seams and tacked around the neckline to hold in place. That would also explain the finished edges on their braid.
See? It looks similar, but it's not quite the same. I'd really like to try making the braided trim separately and adding it to the shirt. If you give it a try, be sure to let me know!








Such a cute idea for a t-shirt! I'd love for you to link up a few posts at my weekend link party@The Weekend re-Treat! on The Best Blog Recipes if you haven't already!
ReplyDeleteHope to see you there!
Shauna
http://thebestblogrecipes.blogspot.com/
http://ready2loseweight.blogspot.com/
Thanks, Shauna - and thanks for the invite - I'll be sure to hop over & check it out!
DeleteVery cool idea! Stopping by from Allis throwback-thursday.
ReplyDeleteThanks, Anna!
Delete