(This post may contain affiliate links which were added to make it easier for you to find the items. If you click on an affiliate link and make a purchase, I will receive a small commission (at no extra cost to you). You are free to use the links or not - if you do, I thank you!)
They're made with the same basic steps, but instead of using adult-sized socks, I used baby socks! The finished product is about 4-5"tall, depending on how much rice you put inside and how tall you make the hat.
Here's how to make your own snowbabies!
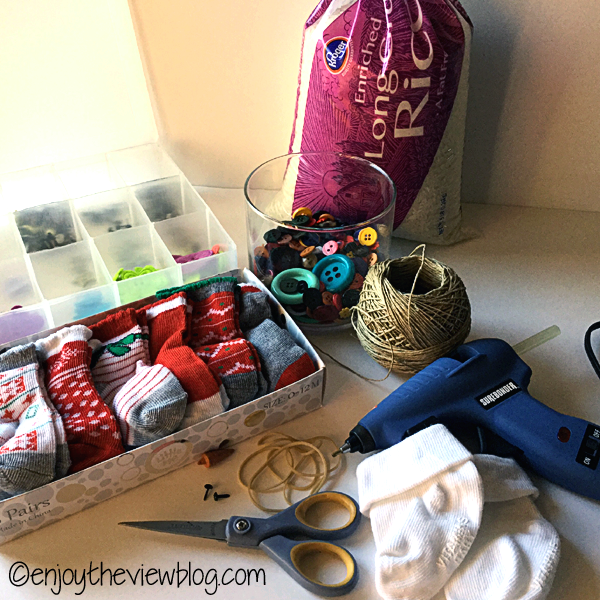
Supplies I used for each snowbaby:
- 1 white baby sock
(0-6 months)
- 1 or 2 patterned baby sock
(s) (0-6 months) (depends on type of hat you want)
- 1 cup uncooked rice
(it's less expensive to buy this locally)
- small rubberband
- 2 mini scrapbooking brads
for eyes (you could also use buttons or something similar)
- 1 carrot nose
(7/8" from Consumer Crafts)
- buttons, jingle bells
, etc. for embellishments
- twine or ribbon
- hot glue gun
- scissors
For clarification, these are the mini scrapbooking brads that I use for eyes on all of my snowmen - the babies and the regular size. I think I bought mine at either Michael's or Hobby Lobby. As you can see, they're about 1/4" in length, and the head is about 1/8" in diameter. I've linked to some on Amazon.
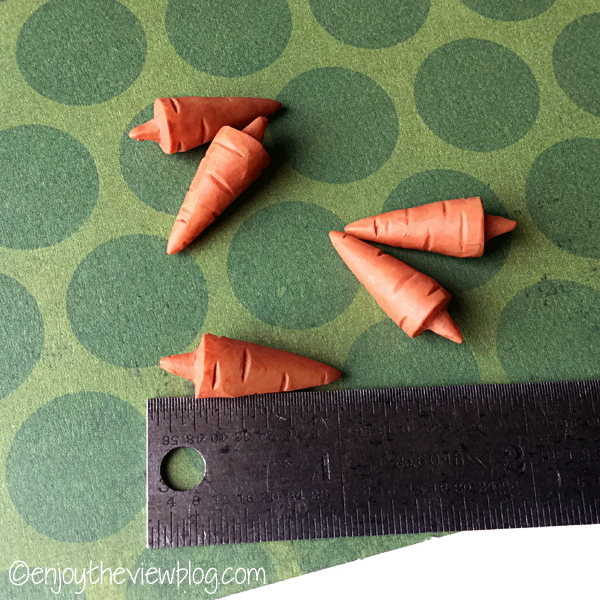
And these are the 7/8" snowman carrot noses that I purchased from consumercrafts.com. I use these noses on both the snowbabies and the regular-size snowmen. They are also available on Amazon. I recommend checking both places and figuring in your shipping costs and the number of noses you need. If ConsumerCrafts is having a shipping special, it will probably be less expensive to purchase from them. If you have Amazon Prime and think you'll need a good number of noses, it might be cheaper to buy from Amazon.
Now on to the tutorial!
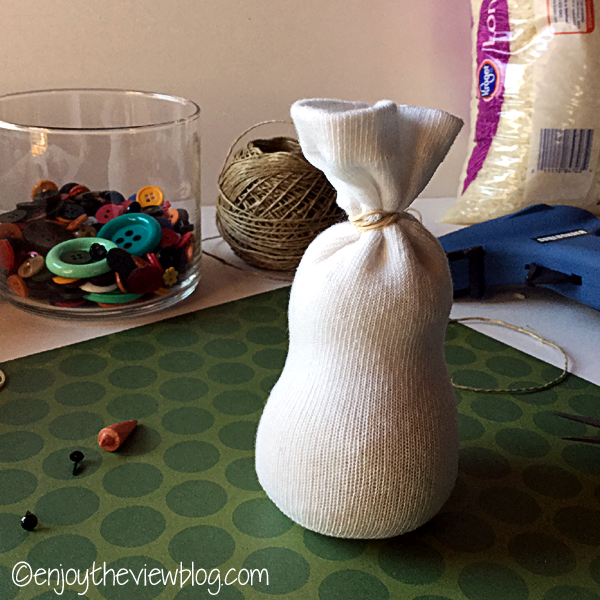
First, fill the white sock with 1 cup of uncooked rice. You may find that using a funnel is easier since the sock is so tiny. The socks I bought had cuffs, so I was able to get a little extra height from them, making my snowbaby body about 4" tall. Hold the sock closed and shake the rice down so that you can get a nice even edge at the top - then use the rubberband to tie off the top of the sock.
If you have used my other tutorial, you will notice one difference here. With the larger socks, you cut off the "leg" of the sock, turn it inside out, close one end with a rubber band, then turn it right side out and begin filling with rice. With the baby socks, the socks are so tiny, I just used the entire sock as the body of the snowbaby.
Depending on the amount of selvage you have left at the top, you may be able to just use the hot glue gun to secure those edges against the top of the sock. I felt like I had too much fabric, which made it bulky. So I trimmed some of the sock away at the top edge, just leaving about 1" of sock above the rubberband. Then I smoothed this out over the top of the snowbaby's head and used the glue gun to glue it down flat.
You're going to use the patterned sock(s) to make the sweater and hat for the snowbaby. The sock pictured below has stripes, which are like little cutting lines. The first cut is going to be from the top of the heel, straight across - this upper part of the sock will create the sweater. The second cut will be from the bottom of the heel straight across - this bottom part will create a small hat.
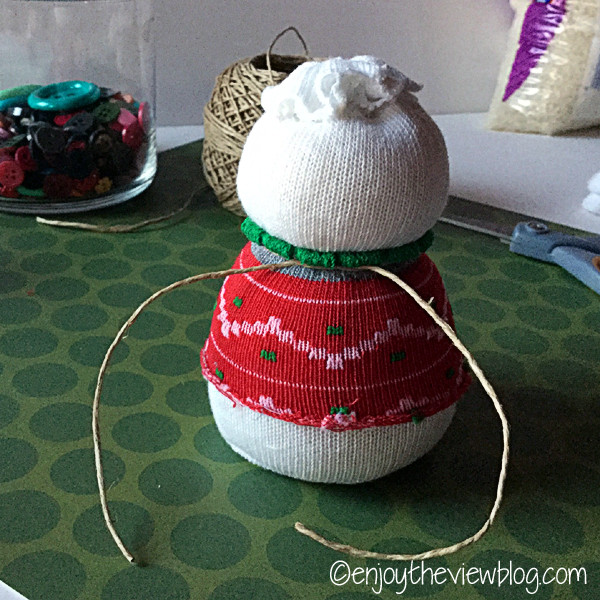
You need to give your snowbaby's body some shape, so stretch that sweater sock (Yes, this is a different sock!) between your two hands, and place it over the snowbaby's body, positioning the band about where you want the neck of your snowbaby to be - then take a piece of ribbon or twine and tie it around the neck and sweater, pulling it tight enough to give the illusion of a neck.
If you choose to make the smaller hat, you will take the toe portion of the sock that you just cut off and tie a pie of ribbon or twine around the toe, about 1" from the end. You can add a button, flower, or jingle bell if you like.
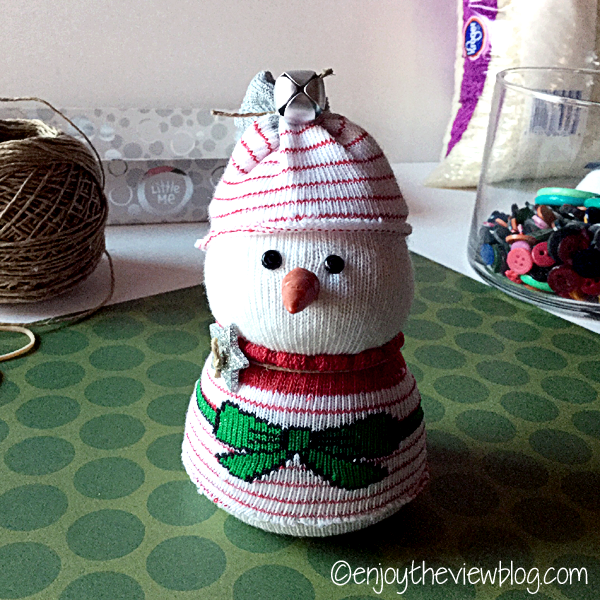
As you can see in the picture below, this smaller hat is cute, but it just seems to be lacking something. I don't know if it's because the sock has so much white in it or if it's just because I feel like I want it to have more. But I decided to use the second patterned sock to make a bigger hat...
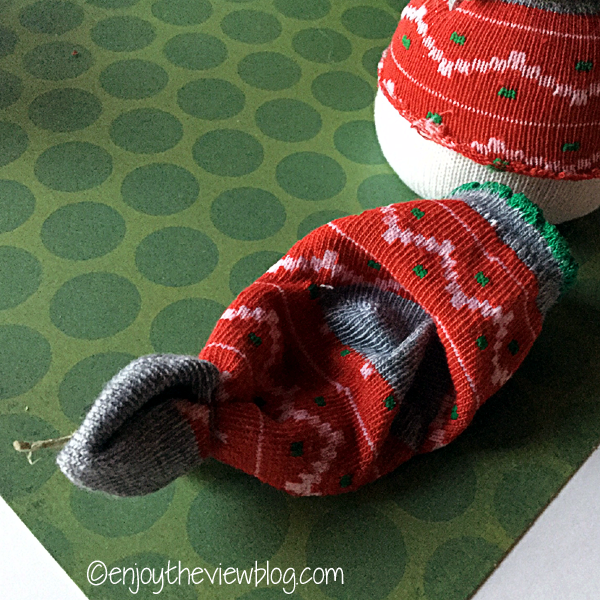
If you opt to make the larger hat, you'll take the second patterned sock and tie off the toe with a ribbon or twine just as I described above. (Yes, this is that different sock again!) Then add your embellishment. Notice the grey area in the center of the sock in the picture below? That's the heel. Just push it back in toward the center of the sock, and turn that side of the sock down...
And the front of the hat will look like this...
Then you're ready to pop the hat on! I like to position mine a little sideways, but you can place it however you like. Then work with the sock/hat until you get the hat positioned the way you want it.
Next, you'll need to position your eyes. Just push the brads through the white sock, being careful not to snag the fabric in case you need to reposition. When you have them where you want them, you can add a dot of hot glue to the back and hold into place until the glue cools.
The nose can be just a little trickier if you have a tightly woven sock. There is that little "knob" on the back of the carrot that needs to go inside the snowbaby's head. If the sock fabric is too dense, you can use a toothpick or other small object to make a small opening, then insert the knob through that with a dot of glue on the back.
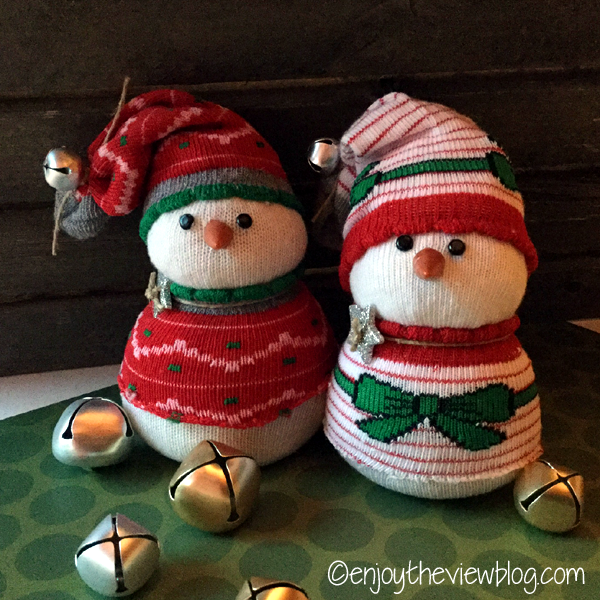
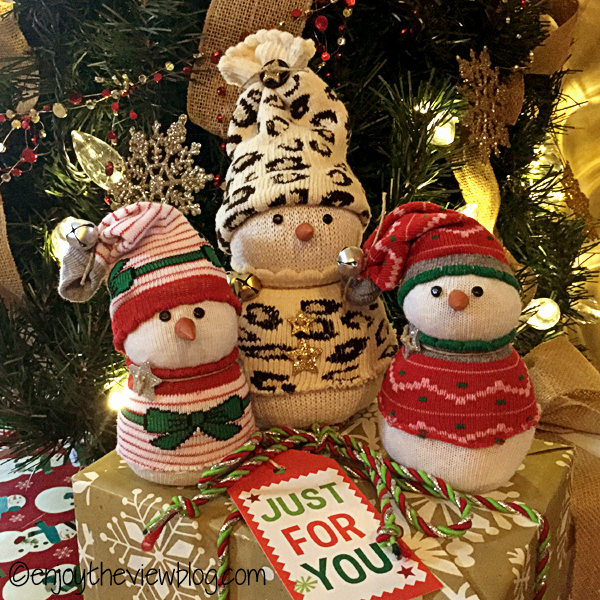
How cute are these?? I'm expecting my first great-niece and nephew early in 2016, so I made these guys for them. Their moms and grandma have the larger versions, and in the pictures below, you can see a comparison of the sizes:
The cheetah-print snowman (which was a request from my niece) is one of the smaller regular-size guys, but you can see that she is a few inches taller than the babies. Also, you'll notice that on the babies, I opted not to put any buttons on the front. The one has a bow on her sweater, so I felt like she didn't need anything else. And then the more I thought about it, the more I decided to leave them without. I do have to make a trip to Jo-Ann's, so if I see some tiny buttons that would work, I might add them, but for now, I think I like them this way.
I hope you enjoyed this snowbaby tutorial, and that you have a blessed holiday season!!










No comments:
Post a Comment
I love reading your comments!!